ClickDealer Webview App Builder A-Z Manual
This guide will teach you how to use our webview app builder to create and set up an app on the Google Play Store that will act as a landing page and bring leads to any link of your choosing. Why do the extra work instead of using the traditional ad-to-landing-page funnel? There are a couple of reasons:
– Apps on the app store generate organic traffic simply by users discovering your app, essentially giving you free clicks.
– Webview apps let you promote verticals on Google and Facebook that you otherwise would not be able to promote.
– Users are getting used to traditional marketing funnels, which gives new approaches like this higher conversion potential.
– The versatility of webview funnels makes them perfect for running smartlinks and dealing with large amounts of mixed traffic.
Need more convincing? Check out the extensive list of perks of ClickDealer’s webview app builder.
Ready to try it out? Then let’s begin!
To access the app builder, you need to go to the “Tools” section of the platform and click on “Webview Apps Integration”. Once you enter the webview app builder’s admin panel, you will have two options to choose from: Android App Builder and Manage In-app Content. As logic dictates, in order to manage in-app content, you have to build the app first, so we will cover the options in order.
Android App Generator
This is where you are going to build your app from top to bottom without typing a single line of code. The first two fields you are going to need to fill out are “App Name” and “Package Name”.

Your package name is the unique ID that identifies your app on the Google Play Store and mobile devices, and you get that from your Google Play developer account. The name comes from your boundless imagination, and it needs to be boundless because the name must be unique among the millions of apps that are already on the Google Play store.
Next, we deal with the graphics. For this step, you will need a 1024x1024px icon and a 2732x2732px splash screen that displays when your app is loading.
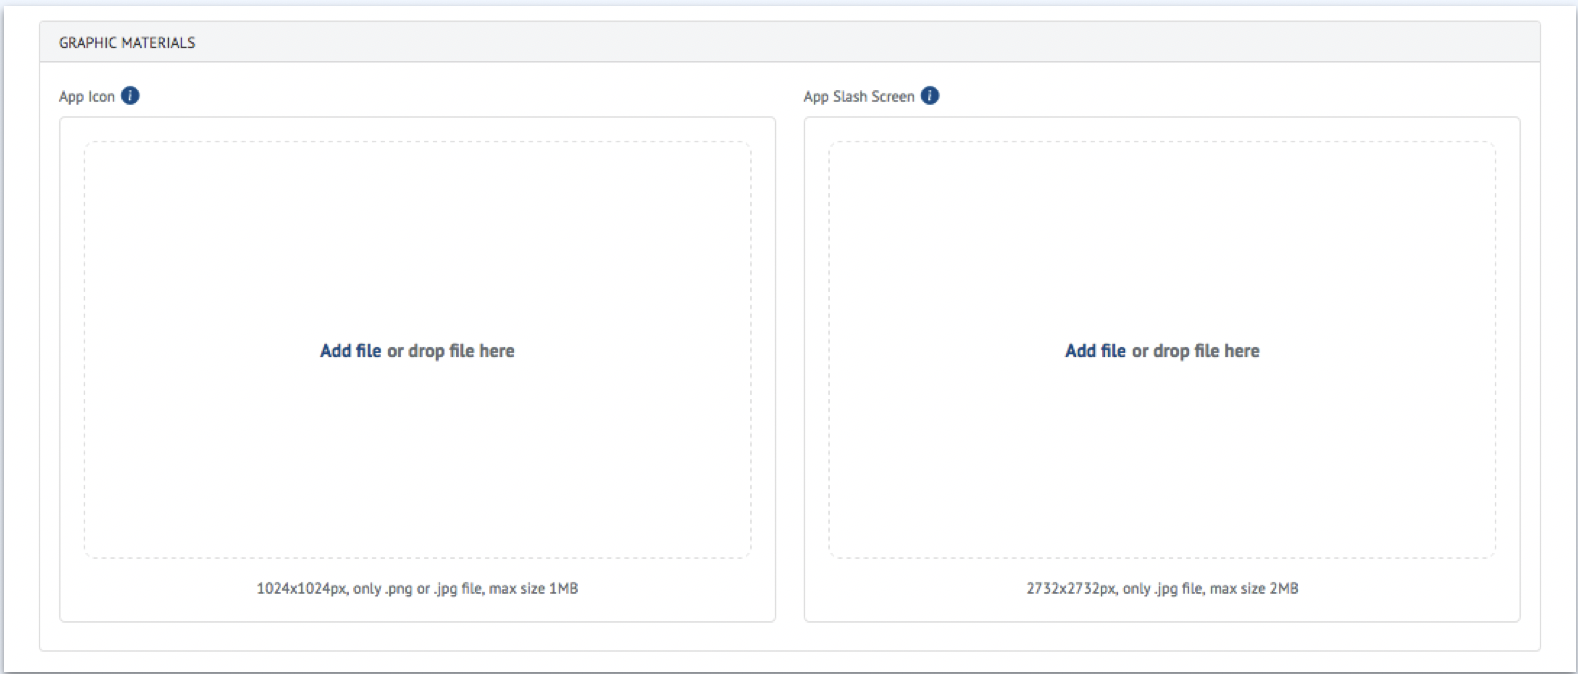
The formats are png or jpg for the icon and only jpg for the splash screen. The maximum file sizes are 1MB and 2MB respectively. We will have a couple more useful tips about the subject matter of your app’s graphics near the end of the guide, so make sure you don’t miss them.
The next part requires the most preparation out of every other step. To proceed, you need to get a privacy policy and a landing page for your app.
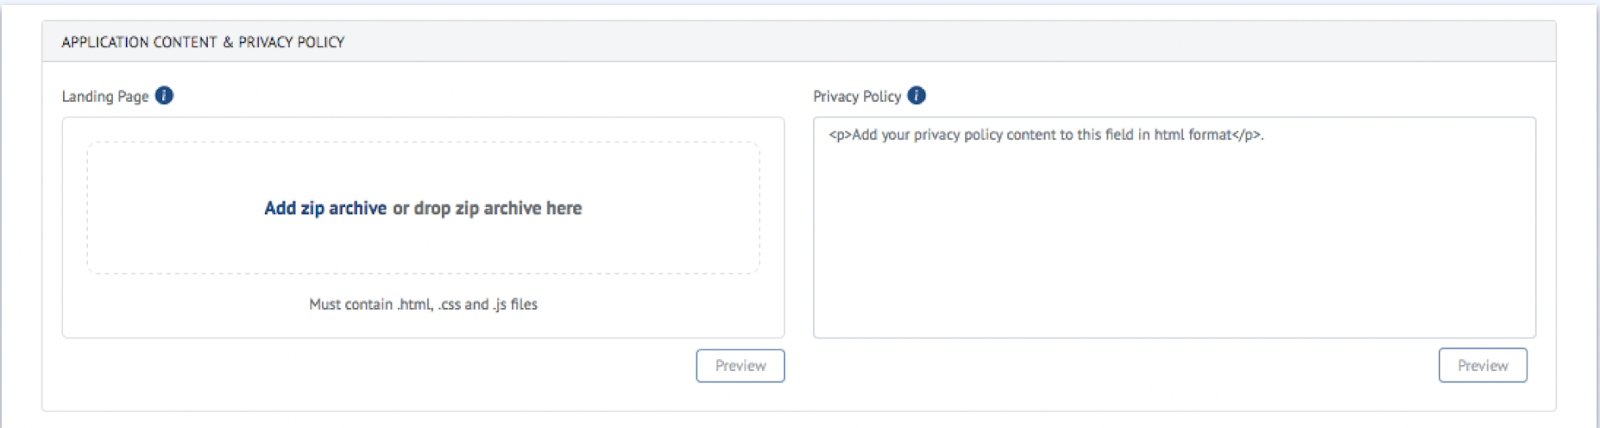
The landing page will be used to pass Google Play moderation and get your app into the store, so you will need a zip archive with a web page that does not violate any of the guidelines listed in Google’s Developer Content Policy.
Your app’s privacy policy is going to be much easier to create because there are several generators online that will make one for you in just a few minutes with minimal input. Almost as convenient as our app builder.
The privacy policy will be hosted on the same domain as your webview content, and you will later need to use the link to it when publishing your app.
The next step deals entirely with SDK integration, so follow closely to make sure your push notifications and in-app tracking work as intended.

To complete this step, you need a Firebase project and an email address. If you want to promote your app on Facebook, a Facebook Developer account will be needed as well, but that part is optional.
Get the server key and sender ID from your Firebase project and paste them into the corresponding fields. Next, do the same with the Facebook APP ID and Client Access Token from your developer account if you run FB, or just add the email address, so we can give you administrator access to the app. With that, your app is ready to publish.

When you click the “Generate” button, you will get a “release-signed.aab” file ready for publishing, a keystore file with passwords to sign your app, a “debug.apk” file for testing, and a link to your privacy policy, hosted on the same domain as your webview content. You will also receive a detailed step-by-step manual for publishing your link on the Google Play Store.
In case you didn’t have some of the files required in the previous steps or just need some extra time to revise your creatives, there is an option to save your draft and edit it later. At any point, you can select your app from the list in the “EDIT DRAFT BUILD” section and continue building, or create a new application with “CREATE NEW BUILD”.
Now that your app has been built and published, it’s time to turn it into a money-printing machine. For that, we turn to the second option on the Webview App Builder admin panel.
Manage In-App Content
This section of the builder is all about setting up offers and smartlinks inside your newly built app. The first set of options you will be presented with upon entering this section is downloading the app, the publication manual, and the privacy policy. On this screen, you can also toggle the offer’s visibility to organic traffic to make sure your app appears or doesn’t appear in search results and recommendations to users browsing the Google Play Store, or form a list of countries where it is going to be visible organically.
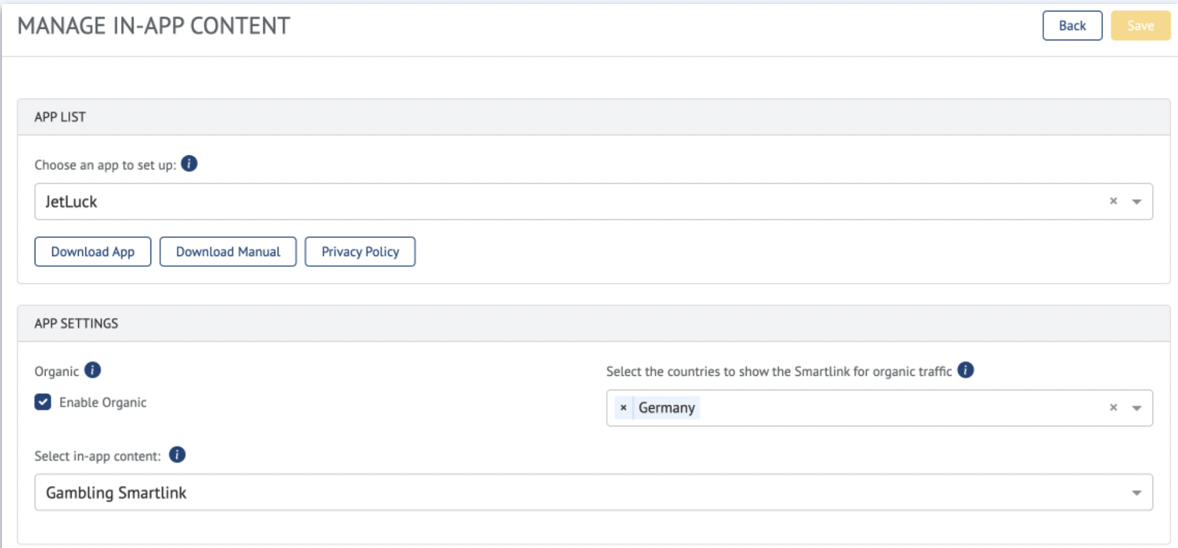
The last option on the list deals with the real contents of the app. The dropdown menu contains every smartlink ClickDealer has, so you will have plenty of material on your hands to work with.
After picking your smartlink comes the URL setup. As with any affiliate link, set your parameters to what you would like to track and you’re golden.
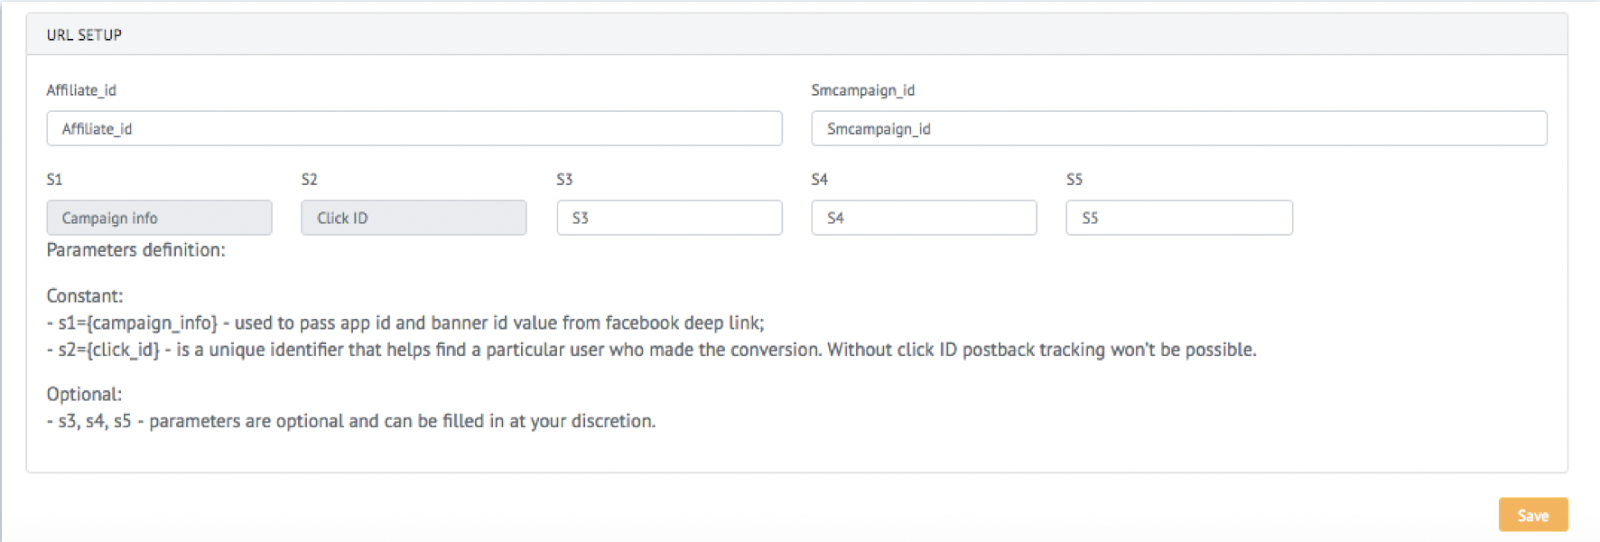
Quick reminder: s1 and s2 are constant for campaign ID and click ID. Otherwise, you have free reign over the type of tokens you need to insert.
This last step is only relevant to those of you planning to run Facebook traffic, so if that’s not something you are interested in, feel free to scroll past this part.
To complete your setup for FB Ads traffic, make sure to add Facebook to your app-ads.txt with property IDs in the required format “facebook.com, Property ID, RESELLER, c3e20eee3f780d68”, where:
– Property ID: the identifier associated with your direct account or the reseller account within the advertising system (property ID, Business ID, or app ID);
– RESELLER: a specification of the type of account (DIRECT or RESELLER);
– c3e20eee3f780d68: an ID that uniquely identifies the advertising system within a certification authority (constant).
With this, your app is ready to generate leads on an industrial scale and show you campaign performance stats unlike anything you have seen before. But how long will it be able to do that depends on what you run and how you set up your creatives for it. Luckily, we have some guidelines that will help you guarantee the profitability and longevity of your apps on the Google Play Store.
Extra Tips
– Never add an exact replica of an existing game into the moderated part of your application. Take time to change up the code and graphics, or Google’s algorithms will make short work of your app.
– Don’t use copyrighted characters and celebrities in your app. Make sure its name is also free of copyrighted titles and brand names.
– Using provocative imagery to grab attention doesn’t work on Google Play. Any hint of suggestive material will get your app declined at best, and your account banned at worst. That goes for the name of the app as well.
– Google doesn’t do well with vices – tobacco, alcohol, etc. Even if your titular character is a pirate, they will have to drop the pipe and rum if you want to make it through moderation.
– Betting, iGaming, binary options, and crypto applications are only allowed in a few countries and require licenses to make it into the store. Keep your app’s store description relatively vague. Your copy should not mention any real money exchanging hands unless you have a license.
– Always make sure that your banners and screenshots for the app store are consistent with the contents of its final build. Otherwise, you might not make it through the compliance check.
– Don’t try to reupload the exact same app several times if it doesn’t work the first time. Make at least minimal changes to its design/banners/description to give it more of a fighting chance against the algorithms.
Your webview app is now up and ready to go. If you have any questions left after reading the manual, don’t hesitate to shoot us an email at info@clickdealer.com or reach out to your account manager.
Launch away and enjoy the profits!